Vanilla Bean Ice Cream
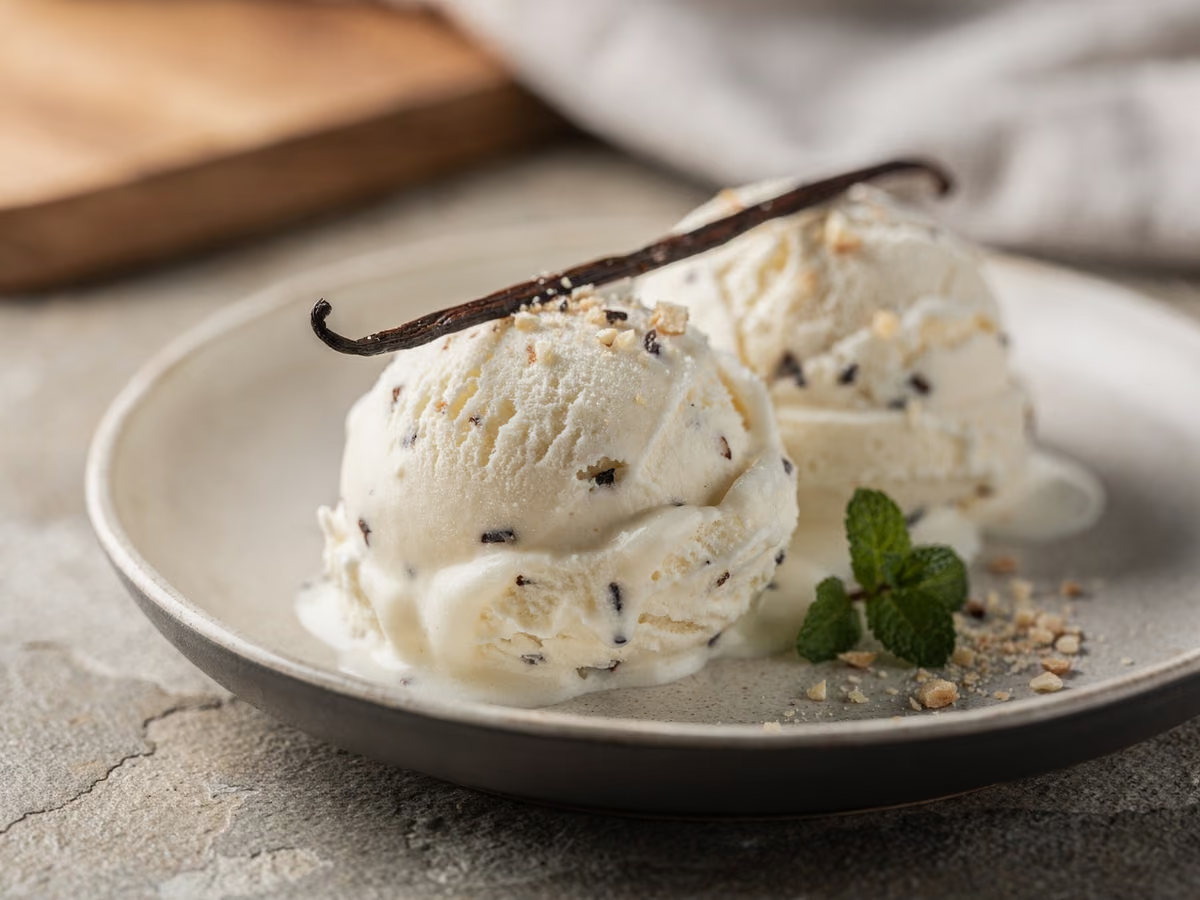
French-style vanilla bean ice cream built on a cooked custard: 500 ml each of whole milk and cream steeped with two split beans, six yolks whisked in and cooked to 82°C, then churned to a dense soft-serve that hardens into a scoop holding its edge. The beans are the reason to make it yourself, since the seeds and pods infuse the dairy for a floral, deep vanilla that extract alone cannot match. Expect about 20 minutes of prep, 15 at the stove, then four hours of chilling, a 20-minute churn and four more hours to firm.
- Prep
- 20 min
- Cook
- 15 min
- Total
- 275 min
- Additional time
- 240 min
- Serves
- 8
Ingredients
What you’ll need — tap to tick off as you go
- 500 ml
- 500 ml
- 200 g
- 1 pinch
Process
Timers built in · swap anything · ask as you cook
Combine the 500 ml whole milk, 500 ml heavy cream, 50 g of the sugar, the pinch of fine sea salt, and the split vanilla pods with their scraped seeds in a medium saucepan. Warm over medium heat until steam rises and bubbles ring the edge, about 5 minutes; do not let it boil or the milk proteins scald. Steep off the heat 15 minutes to draw out the vanilla.
While the dairy steeps, whisk the 6 egg yolks with the remaining 150 g sugar until pale, thickened and slightly ribbony, about 2 minutes. Whisking first dissolves the sugar so it cannot clump when the warm dairy arrives, and the yolks take up the heat more evenly.
Remove the vanilla pods from the warm dairy and discard them, then temper: pour about 250 ml of the dairy into the yolks in a thin, steady stream, whisking the whole time. Slowness is the point, because it raises the yolk temperature gradually instead of scrambling the proteins on contact.
Pour the tempered mixture back into the saucepan and cook over medium-low heat, stirring constantly with a spatula and scraping the bottom and corners, until the custard reaches 82°C and coats the spatula, 6 to 8 minutes. A finger drawn across the spatula should leave a clean line that holds. Do not let it boil; past the mid-80s the yolks overcook and the custard curdles into grainy, sweet scrambled egg.
Strain the custard through a fine-mesh sieve into a clean bowl, then set the bowl in a larger bowl of iced water and stir until the custard cools to room temperature; the ice bath stops the carry-over heat that would otherwise keep cooking the eggs. Cover and refrigerate until completely cold, at least 4 hours or overnight.
Churn the cold custard in an ice cream machine until it looks like soft-serve and holds a thick ribbon, 20 to 25 minutes. Without a machine, pour it into a shallow metal pan, freeze for 45 minutes, then beat vigorously with a fork or electric mixer and repeat the freeze-and-beat cycle 4 to 5 times, until smooth.
Scrape the churned ice cream into a chilled 1-litre container, press a piece of baking paper directly onto the surface, cover, and freeze for at least 4 hours to firm up. The paper blocks the air that forms an icy skin and coarse crystals on the surface.
Why this recipe works
The yolks are the texture engine: their proteins coagulate through the 70s and low 80s, while lecithin emulsifies butterfat and water so the base freezes as one creamy mass instead of separate ice and fat. Pulling at 82°C sits deliberately above the FDA's 71°C cooked-base guidance for homemade ice cream and safely below the mid-80s, where yolk proteins over-coagulate and the custard turns grainy. The full 200 g of sugar lowers the freezing point and keeps the finished scoop soft enough to scoop, and chilling the base completely before churning makes it freeze fast against the machine's cold wall, which keeps the ice crystals small instead of coarse and icy.
Equipment
- Medium heavy-bottomed saucepan, about 2 litres
- Whisk and a silicone spatula
- Heatproof mixing bowl for the yolks
- Instant-read thermometer
- Fine-mesh sieve
- Large bowl of iced water for cooling the custard
- Ice cream machine, or a shallow metal pan and a fork for the no-machine method
- 1-litre container with a lid, chilled
Kitchen notes
Kitchen notes
- Test your thermometer before custard day: an ice bath should read 0°C and boiling water 100°C, or the expected figure for your altitude. A few degrees of error near 82°C is the whole difference between silky and grainy.
- Lay out the sieve and the iced-water bowl before the custard reaches temperature. From the moment it hits 82°C it should be off the heat, through the sieve and into the ice bath within a minute; carry-over heat does its damage in the meantime.
- Scrape each split pod flat with the back of a knife to press out every seed, then steep the pod pieces too: the outer pod is packed with aromatic oils that keep releasing into the hot dairy.
- Put the ice cream machine's bowl in the freezer the night before, and chill the container you will pack the ice cream into. A frozen bowl churns faster and a cold container keeps the base from melting on contact.
- Let the cooked base rest overnight if the day allows: a full night in the fridge lets the fat crystallise and the vanilla meld through the mixture, which gives a rounder flavour and a creamier churn the next day.
Common mistakes
- Grainy, curdled custard: the heat was too high or the base went past the mid-80s, where yolk proteins clump together. Keep it at medium-low, stir with a spatula across the whole pan floor, and pull at 82°C; if you spot the first grainy flecks, strain the base immediately, which rescues it before real lumps form.
- A thin base that freezes icy and tastes eggy: the custard came off the heat before it was cooked through, so it never thickened. Wait for the clean finger line across the spatula at 82°C rather than timing it; an undercooked base stays watery when churned and never turns silky.
- Scrambled specks through the custard: the dairy went into the yolks too fast during tempering, or the base was allowed to boil afterwards. Pour in a thin stream with the whisk moving constantly, keep the heat at medium-low, and take the pan off the stove the moment it bubbles.
- Ice cream that freezes into a rock-hard block: the base went into the machine warm, or the churn was cut short. Custard must be fridge-cold (4 hours minimum, overnight better) and churned all the way to soft-serve, because both steps decide how small the ice crystals end up.
- A crystal-flecked surface after a few days: the ice cream was exposed to air in the container. Press baking paper onto the surface before the lid goes on and aim to finish it within 2 weeks, when the texture is still at its best.
Serving suggestions
- Scoop into chilled bowls or glasses so the ice cream softens slowly and holds its shape at the table.
- Affogato: two small scoops under a shot of hot espresso, which is the classic way to let the vanilla lead.
- Serve over warm brownies, apple crumble or shortbread, where the cold scoop meets a hot base.
- The 1-litre batch gives 8 servings of two small scoops; a drizzle of olive oil and a few flakes of sea salt is worth trying once.
Variations
- Caramel version: melt 50 g of the sugar to a light amber caramel before the dairy goes in, then stir until it dissolves; the finished ice cream is amber-tinted and toffee-scented, with the other 150 g still going to the yolks.
- Dairy-free: replace the milk and cream with 1 litre of full-fat coconut milk or an even blend of coconut cream and oat milk, keeping the 6 yolks; the flavour turns coconut-forward and the set is slightly softer.
- Ripple it: layer the churned ice cream with fruit coulis, lemon curd or fudge sauce as you fill the container, so the sauce freezes into soft veins that scoop cleanly alongside the vanilla.
Refrigerator
- RefrigeratorThe finished ice cream lives in the freezer; the fridge is for the custard. Keep the covered base chilled for up to 3 days before churning, and make sure it is completely cold going into the machine.
- ReheatingNone, it is served frozen. To soften a hard tub, leave it at room temperature for 5 to 10 minutes or microwave in 10-second bursts; never refreeze ice cream that has fully melted, because it loses its air and comes back hard and grainy.
- FreezingStore in a 1-litre airtight container with baking paper pressed onto the surface. Texture is best within 2 weeks and good up to 1 month with the surface wrapped tightly; freezing keeps food safe indefinitely, so what fades past that point is quality, not safety.
- Make aheadMake the custard up to 3 days ahead and churn it straight from the fridge, or freeze the base for up to 1 month, thawing overnight in the fridge and churning cold. Once churned, 4 hours in the freezer is the minimum to firm it; a full night gives the cleanest scoop.
Updated:
How this recipe was developed
- FDA, Enjoying Homemade Ice Cream without the Risk of Salmonella Infection (cooked egg base to 160°F/71°C; pasteurised eggs or egg products for an uncooked base)
- USDA FSIS, safe minimum internal temperatures for egg dishes (71°C), homemade ice cream egg-safety guidance, and freezing and food safety (frozen storage is for quality; food kept frozen stays safe)
- Terumimorita journal, custard base (yolk proteins thicken from about 72°C; a clean nappe at 80–82°C; grainy by 85°C in the site's own tests)
- Harold McGee, On Food and Cooking — egg-yolk coagulation in custards and the effect of sugar on an ice cream base's freezing behaviour
Editorial references are kept internally for verification. This page makes no claim of external certification or professional testing.
FAQ
The questions we get asked most
Is homemade ice cream made with raw eggs safe?
It depends on the base. This recipe cooks the custard to 82°C, past the FDA's 160°F (71°C) guidance for a cooked egg base, which the FDA recommends precisely because freezing does not kill Salmonella. Start with pasteurised dairy and, if anyone at the table is in a higher-risk group, use pasteurised shell eggs or pasteurised yolks as well.
Why did my ice cream turn out icy instead of creamy?
Almost always a warm base, a thin base or a short churn. The custard must be completely cold, 4 hours minimum and overnight if you can, so it freezes fast into small crystals; the recipe's 35 percent cream supplies the fat that keeps crystals small; and the churn runs until the texture is soft-serve. Cutting back the 200 g of sugar also makes a harder, icier block.
What does a curdled custard look like, and can it be saved?
It turns from glossy to faintly speckled, with pale grainy flecks visible against the spatula and in the pan. Caught at that first grainy look, pull it off the heat and strain it through the sieve; a lightly grainy base still churns into decent ice cream. Once it has visibly scrambled into lumps, the eggs are cooked through and the batch is best started again.
Can I make vanilla bean ice cream without a machine?
Yes. Pour the cold custard into a shallow metal pan, freeze it for 45 minutes, then beat it hard with a fork or electric mixer and repeat the freeze-and-beat cycle 4 to 5 times until smooth, then freeze 4 hours. The result is a little denser than machine-churned ice cream, since hand-beating works in less air.
Can I use vanilla extract instead of a vanilla bean?
Yes: 1 tbsp of pure extract replaces the 2 beans, stirred in after the custard comes off the heat so its aromatics do not cook away, or use 2 tbsp of vanilla bean paste added with the dairy for the closest match to the real pods.
How long does homemade vanilla bean ice cream keep?
Best within 2 weeks and good up to 1 month if the surface is pressed with baking paper and the container is lidded. Frozen food stays safe far longer, but the vanilla fades and ice crystals build, so earlier is noticeably better.
Can I freeze the custard base before churning?
Yes: refrigerate it up to 3 days, or freeze it up to 1 month and thaw overnight in the fridge. Stir it and churn only when it is fully cold and still liquid; a warm base smears into coarse crystals and a partly frozen one will not take in air.
Ask KitchenMind about this recipe
Tell it what’s different tonight — it works within the actual recipe.